Getting started
Thank you for choosing Ubix Linux!
This guide will have you up and running in no time at all. You may follow (or not) those different steps.
- Choose your most appropriate way to experience Ubix Linux.
- Review the different steps needed to achieve your goal.
- Download Ubix Linux.
- Create a virtual machine on which to install Ubix Linux.
- Create a bootable USB device in order to run/install Ubix Linux.
- Install Ubix Linux using the Calamares installer.
Intended use
| Goal | Main purpose | Proposal |
|---|---|---|
| Discover | You want to have a quick look at Ubix Linux by yourself. | If you have virtualization software available, the best solution is to directly run a virtual machine from an Ubix Linux ISO file. If you don't, we suggest you to create a bootable USB stick and run a live session of Ubix Linux from it. |
| Learn | You eager to unlock the mysteries of data science. | We recommand you to install free virtualization software (such as Oracle Virtual Box ou VMware Player) on your laptop/desktop and then, create a dedicated Ubix Linux virtual machine. |
| Use | You would like to make Ubix Linux your daily driver in order to work on data. | Install Ubix Linux on a bare metal device such as a laptop or a desktop. |
| Surf | You need to keep with you analysis tools and/or data whenever and wherever you go. | Keep an USB key in your pocket with a Ubix persistent live session installed on it. Stay aware that this kind of configuration underneeds advanced skills and knowledge to work efficiently. |
Installation process overview
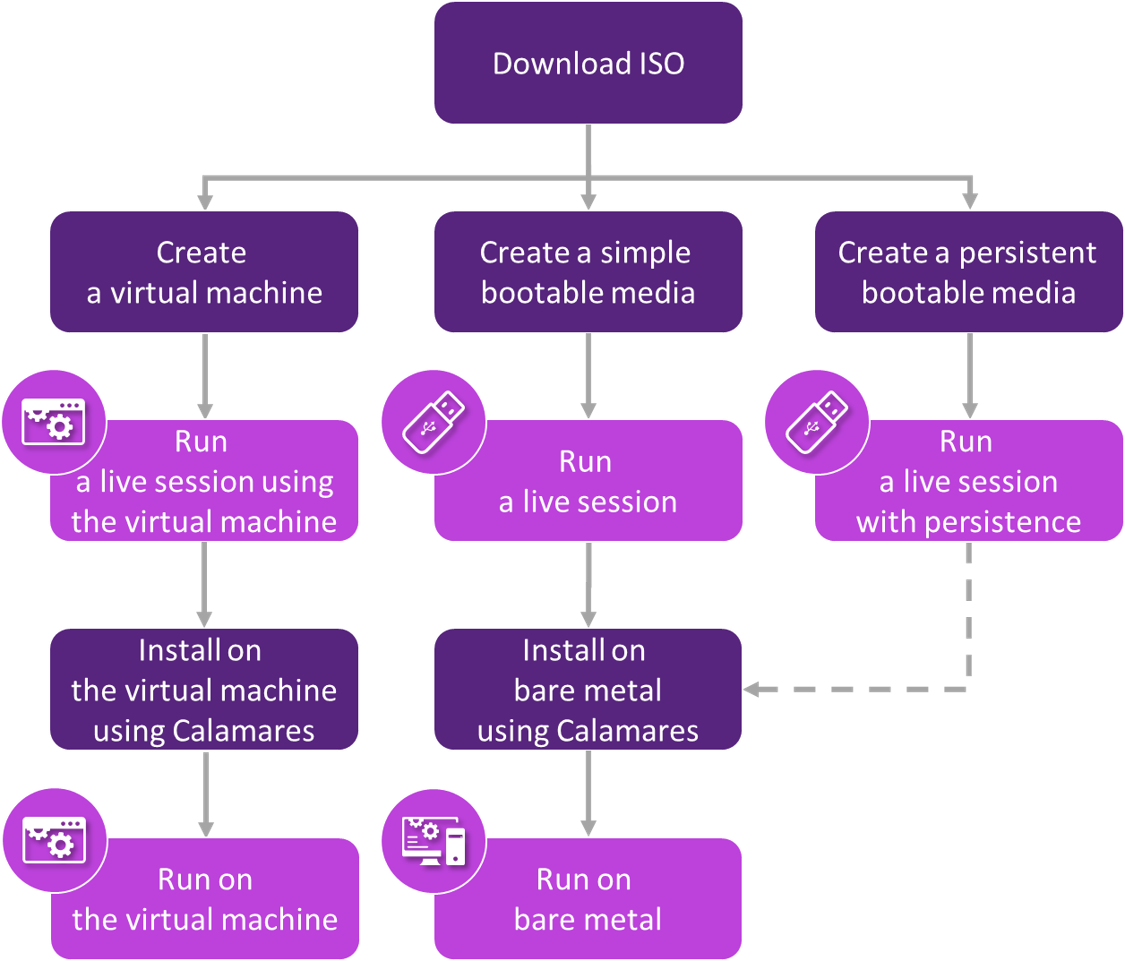
The diagram opposite shows you the different steps to follow to obtain each of the proposed configurations.
The light purple steps show the different options for running Ubix Linux which we have already discussed above.
The dark purple steps are one-shot installation steps and refer to one of the chapters below. So you do not to read everything : choose your goal and follow the path !
In short, Ubix Linux comes in the form of an ISO image (an .iso file) which can be used to make a bootable USB device or a virtual machine. This guide will help you download the right ISO image, create your bootable media and install Ubix Linux either on your computer or a virtual machine.
Download Ubix Linux
Whatever your intended use of Ubix Linux, you first need to download one of the ISO files listed below.
| Date | Version | Code name | Size | Checksum | ISO File |
|---|---|---|---|---|---|
| 21/12/2023 | 0.4.3 | Aroon Arena | 2 478 178 304 o | 40d24cc871b252ca981bb8d074e547d8 4165f3622b56d08a6b971212fa2858e3 | Download |
That done, we recommand that you verify the downloaded ISO file has not been corrupted by any way. This can be performed by applying the SHA-256 hash function over the file. It is worth noting that SHA-256 is usually used for authenticating Debian software package.
Assuming you downloaded Ubix Linux to your default « Downloads » folder, open the Command Prompt and run the following command.
On Windows
CertUtil -hashfile Downloads\ubix-linux-amd64.v0.4.3.iso sha256On Linux
Sha256sum Downloads\ubix-linux-amd64.v0.4.3.isoIt should produce a hexadecimal code matching that given as the checksum of the ISO file. For example, on Windows:
SHA256 hash of Downloads\ubix-linux-amd64.v0.4.3.iso:
40d24cc871b252ca981bb8d074e547d84165f3622b56d08a6b971212fa2858e3
If the checksum does not match, you may need to download the ISO file again and make sure the download is complete before verrifying the checksum.
Please keep the downloaded ISO file on your computer when following the next steps.
Create a virtual machine
You must have virtualization software on your computer. If you haven't already done so, you can download and install Oracle VM VirtualBox which is open-source and, therefore, free to use. You can also choose VMware Workstation Player which is only free for personal or educational use.
As Oracle VM VirtualBox works identically on Windows, Linux, macOS, we will use this option to describe how to create and run a Ubix Linux virtual machine. However, the process remains essentially the same with VMware Workstation Player.
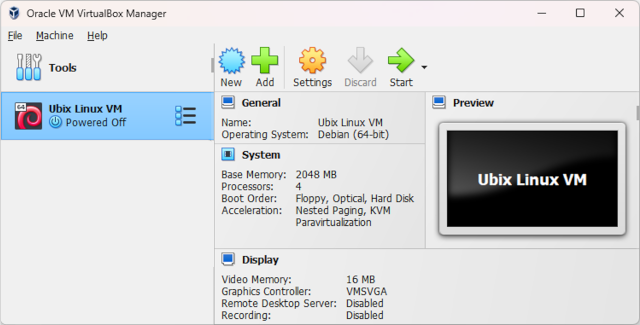
When you start Oracle VM VirtualBox, the VirtualBox Manager window is displayed.
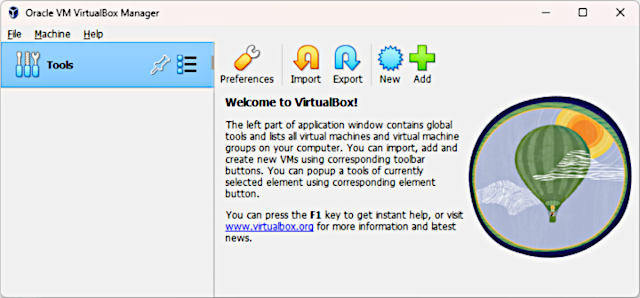
Click « New » in the VirtualBox Manager window. The Create Virtual Machine wizard is shown, to guide you through the required steps for setting up a new virtual machine (VM).
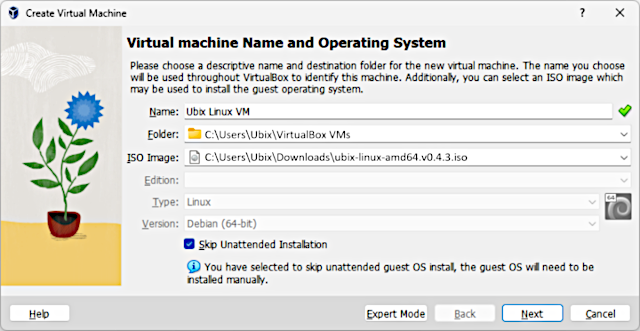
You can than specify a name for the new virtual machine. We suggest that you keep the default storage location proposed for VMs. You also have to indicate where the previously downloaded ISO file is located. You won’t find Ubix Linux listed in the operating system combobox : you may choose Linux and Debian (64-bit) instead.
You should finally select the « Skip Unattended Installation » option and click the « Next » button.
The next step allows you to configure hardware settings for the virtual machine.
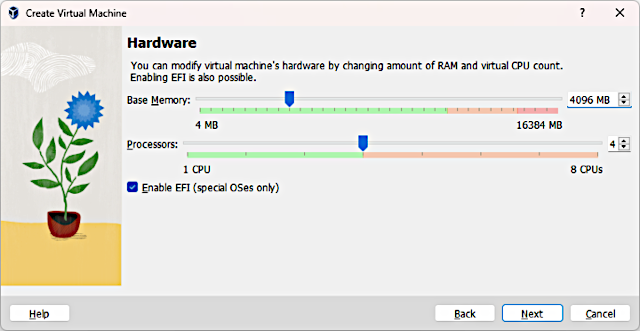
Although it mainly depends on the capabilities of your computer, we recommend initially allocating between 2048 and 4096 MB of base memory and 2 to 4 vCPUs. Keep in mind that when working with data, the more resources you have, the better, if you can afford it. On the other hand, you need to ensure that the host operating system has always enough RAM and CPU threads to prevent its standstill.
Be aware that you need to enable EFI mode.
Reminder
Although Ubix Linux live sessions can be started in legacy or EFI mode, it is only possible to install Ubix Linux in EFI mode.
Click the « Next » button.

If you want to launch a live session without keeping any change, you can choose to not add a virtual hard disk and keep on the process by clicking the « Next » button. Anyway, this is not the most common way to use a VM but it keeps little place on your host system and let you discover Ubix Linux.
If you plan to work more consistently with your VM, you should create a virtual hard disk for it. It is materialized by a large file on your host system, that represents an entire hard disk where to install the operating system, as well as the data of your VM. So you can whenever copy it to another host and use it with another Oracle VM VirtualBox installation.
Use the « Disk Size » slider to select a maximum size for the hard disk : 20 GB is generally a good choice. Deselect the « Pre-Allocate Full Size » setting to keep the virtual hard disk file small initially. As the drive is filled with data, the file grows to the specified size. This limit can be changed later.
Click the « Next » button to show a summary of the configuration for the virtual machine.

Click the « Finish » button to create your new virtual machine.
You can now start the new virtual machine by selecting the VM's entry in the machine list in VirtualBox Manager, and click the « Start » button in the toolbar the top of the window.
Doing so, main live boot options are quickly shown, This is because you must first start a live session to access the Calamares installer.
We suggest you choose the option with localization support which will automatically configure your keyboard. You will then have to choose your dialect.

An animated splash screen is displayed during the boot sequence.

Once finished, you will find the Calamares installer as the first icon in the desktop applications dock and/or in the « System » folder in the application tray.
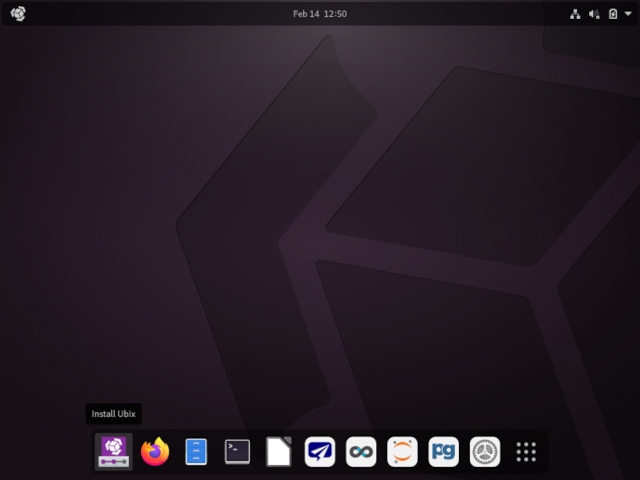
By clicking on the icon, the Calamares installation process starts. We now invite you to follow the instructions described in the dedicated paragraph below.
Create a bootable USB device
You need to write the previously downloaded ISO file to a USB flash drive using a dedicated software such as balenaEtcher or Rufus, both open-source and free.
As balenaEtcher works identically on Windows, Linux, macOS, we will use this option to describe how to create and run a bootable USB device with Ubix Linux installed on it.
Plug the USB flash drive into your computer.
Warning
All contents on the USB flash drive will be erased. We recommend that you use an empty USB flash drive or back up the contents of your USB flash drive now.
Download balenaEtcher, install it and run it.
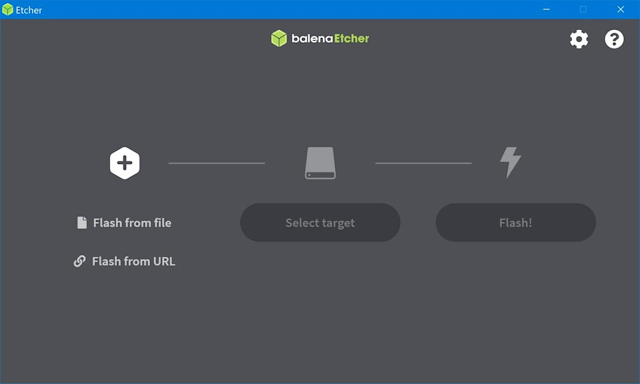
Click the « Flash from file » button and select the previously downloaded ISO file.
Click the « Select target » button.
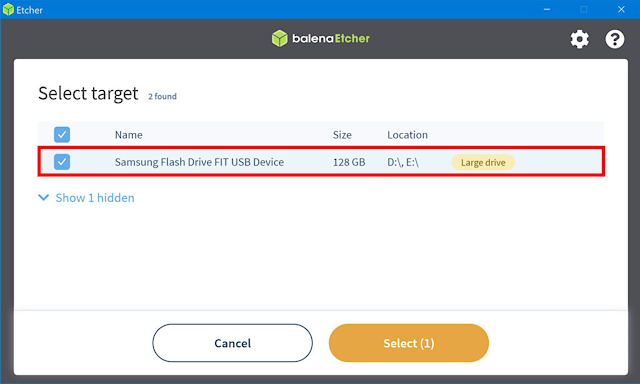
Select your USB flash drive. balenaEtcher automatically hides sensitive disks. If you need to access them, you can find them by clicking on « Show hidden ».
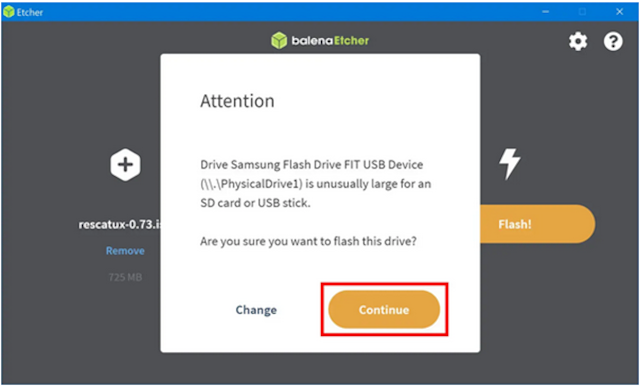
Click the « Flash ! » button to start copying the ISO file to your USB flash drive.
If your USB flash drive has a lot of disk space, balenaEtcher will display a security message in case you selected a HDD/SSD by mistake. Confirm by clicking the « Continue » button.
Wait until the process completes.
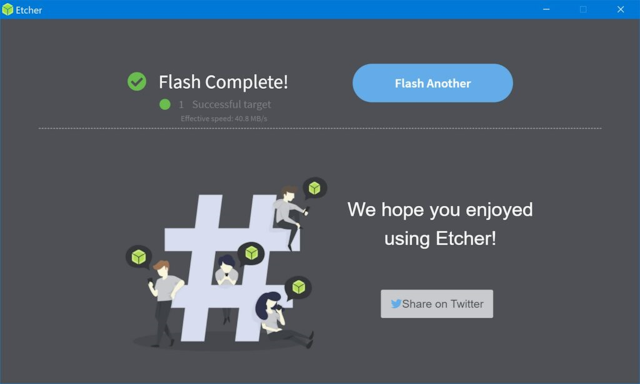
Now that you have Ubix Linux installed on a USB flash drive, you can boot any computer from it.
Insert the USB flash drive into the computer you would like to run Ubix Linux.
Restart the computer.
Before the computer boots its primary operating system (Windows, Mac, Linux), you should see its BIOS loading screen. Check the screen or the computer’s documentation to know which key to press and instruct your computer to boot on USB.
Note
Most BIOS have a special key you can press to select the boot device and all of them have a special key to enter the BIOS configuration screen (from which you can define the boot order). Depending on the BIOS, these special keys can be Escape, F1, F2, F8, F10, F11, F12, or Delete. That information is usually briefly written on the screen during the boot sequence.
Hint
On Macs, keep your finger pressed on the Alt or Option key after hearing the boot sound.
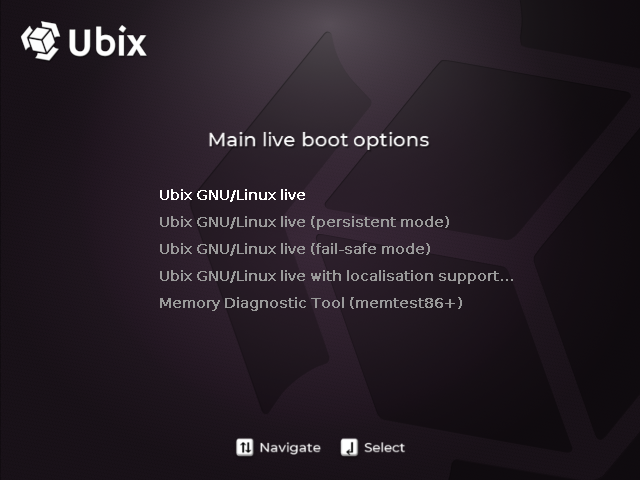
Ubix Linux can be booted both in EFI or BIOS mode. In EFI mode it shows a Grub menu (see previous chapter for screenshots) . In BIOS mode it shows an Isolinux menu as shown below.
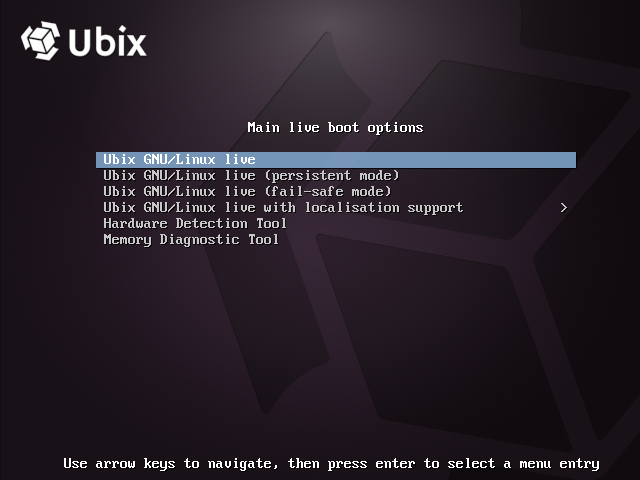
We suggest you choose the option with localization support which will automatically configure your keyboard. You will then have to choose your dialect.
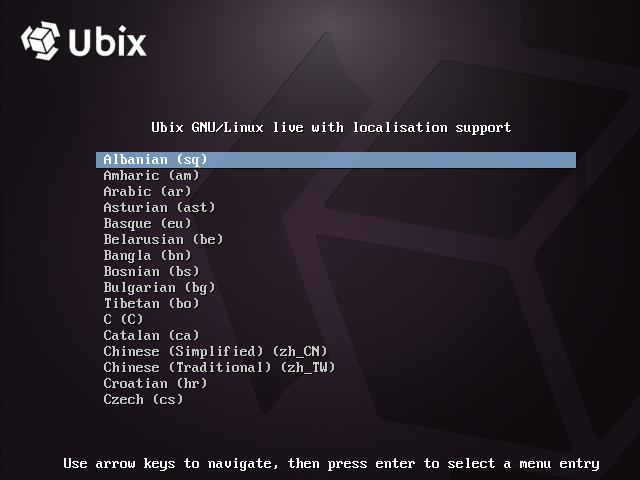
An animated splash screen is displayed during the boot sequence.
Once finished, you will have access to Ubix Linux desktop in a live session.
You can then install Ubix Linux on its host, finding the Calamares installer as the first icon in the desktop applications dock and/or in the « System » folder in the application tray. By clicking on the icon, the Calamares installation process starts. We now invite you to follow the instructions described in the dedicated paragraph below.
Install Ubix Linux using the Calamares installer
Using the Calamares installer is the default way to deploy Ubix Linux on bare metal or a virtual machine. Knowing that this tool is only available in the Ubix Linux live session, you should at this point have followed the instructions in one of the previous chapters of this guide (i.e. create a virtual machine or device bootable USB) and have started such a session.
You can identify the Calamares installer as the first icon in the desktop applications dock and/or in the « System » folder in the application tray. By clicking on this icon, the Calamares installation process will start.
Reminder
Although Ubix Linux live sessions can be started in legacy or EFI mode, it is only possible to install Ubix Linux in EFI mode.
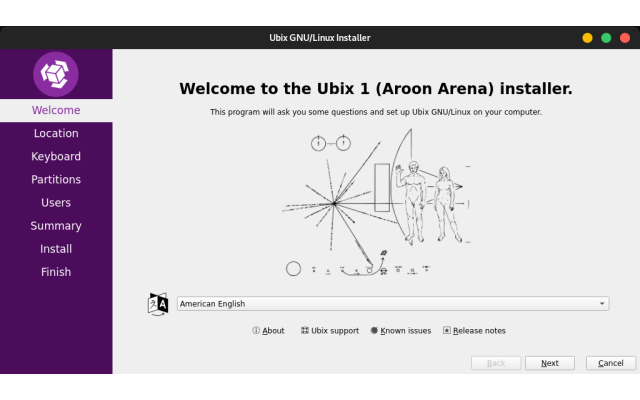
Welcome
Calamares begins by verifying that the target configuration is sufficient to install Ubix Linux. If there is not enough disk space or RAM, the installation is aborted.
Select your prefered language for the installation process and click the « Next » button.
Location
Select your region, time zone, system language and locale (i.e. date ans currency formats). If you're connected to the Internet, this will be adjusted automatically.
Click the « Next » button.

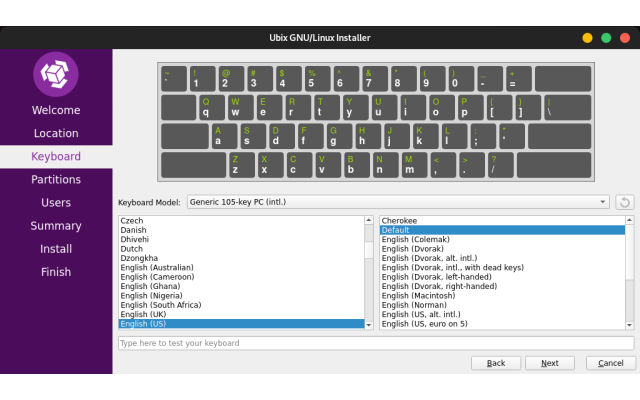
Keyboard
Although Calamares automatically adjusts the keyboard layout based on your previous choice for system locale, you may want to fine-tune your configuration. You can then test it by typing text in the designated box.
Click the « Next » button.
Partitions
This part of the installation process is the most challenging for anyone new to installing an operating system. Do not hesitate to seek help and advice if necessary.
Warning
All contents of the partition(s) dedicated to Ubix Linux will be erased. We recommend using new or empty partitions to avoid any risk of data loss. You can also now save the contents of reused partitions if necessary.
Several options are available, depending on your objectives and your level of technical expertise.
Automated options
- Shrink an existing partition and install alongside any other OS already available on your system, using a filesystem selected as default by your distribution.
- This option should only be used by experienced users due to the risk of damaging existing configurations.
- Choose an existing partition to be replaced with a new installation using the same filesystem type already present on the partition.
- First save the contents of this existing partition if necessary.
- Use the entire disk and will create one partition where all will be installed under root, all other partitions will be removed and the filesystem used will be the default set by your distribution.
- First save the contents of existing partitions on this disk if necessary.
- This is the simplest and most direct method, especially used when installing a virtual machine.
Manual options
- This method gives you the freedom to set any option, any filesystem and partition table, but leaves it entirely up to you to completely break the install too. Make sure you know what you are doing.
- This option should only be used by experienced users due to the risk of damaging existing configurations.
For security and simplicity reasons, the following instructions are executed on an empty disk in single boot mode, such as when installing Ubix Linux on a newly created virtual machine.
Here, You can see that the disk is completely empty and has no partition at all.

But keep in mind that on bare metal, this is not the best option unless you decide to completely wipe your system. For example, in the screenshot below you can see that the disk already has a partition created during a previous installation of Ubix Linux. Let’s say we don’t need it any more.
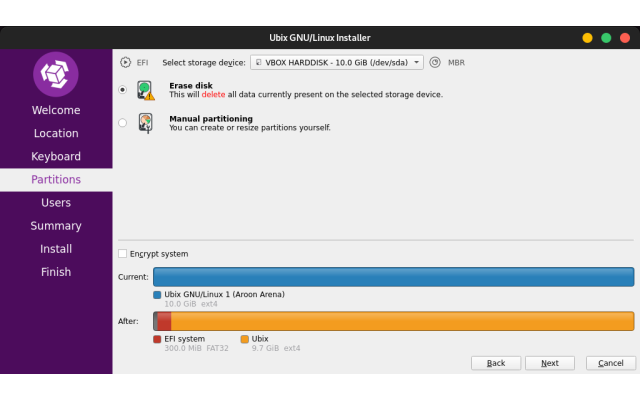
In those cases, you just need to select « Erase disk ».
Once this option is selected, the « After » bar appears and describes the partitions that the installer will create and configure. An option to encrypt the system with a set password is also provided.
Click the « Next » button.
Users
The installation process naturally creates the first user account for your brand new Unix Linux system. You will need to provide it when you first log in.
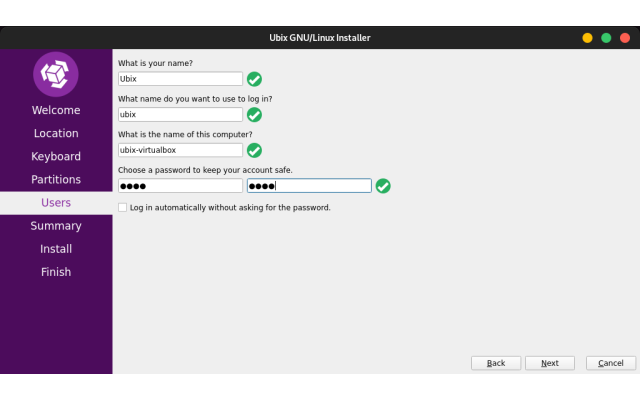
Fill the form and click the « Next » button.
Summary
Before making any real changes to the system, a summary of what will actually be done is displayed. At this point, you can return to any of the previous steps to correct potential misconfigurations.
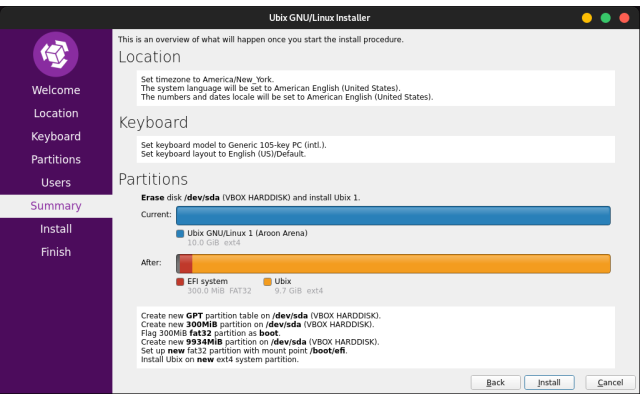
Click the « Next » button to start the installation.
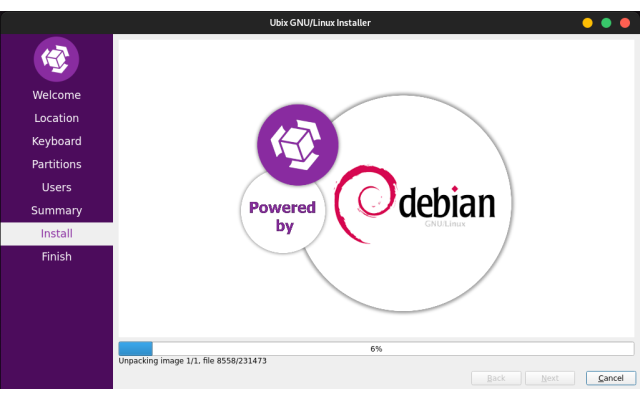
Install
The complete installation process takes a few minutes. A slideshow is displayed during this time.
Finish
Once the process is finished, a final summary is displayed giving you the choice to reboot to your new configuration or to remain to live mode.
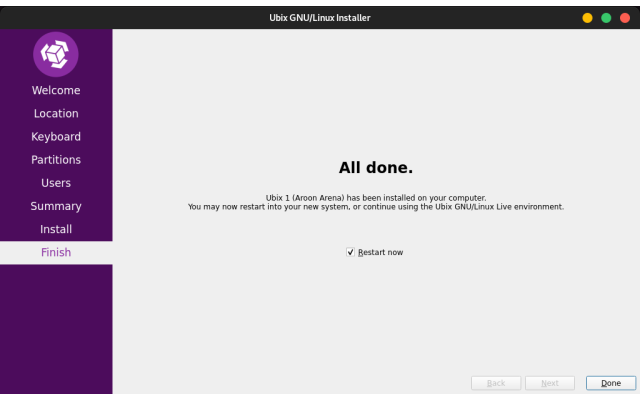
We sincerely hope that you enjoy the Ubix Linux experience!